
Create a Team
Create a team workspace for managing your roster, schedule, lineups, and pitching throughout the season.
Last reviewed
Creating a team is how you begin managing its roster, schedule, lineups, and pitching information in Inningly.
If you are new to Inningly, this is the next step after verifying your email and signing in. If you already use Inningly, follow the same process whenever you begin managing another team or season.
Create one Inningly team for each team and season you coach.
Open the team creation page#
If this is your first team:
- On the Dashboard, find Create your first team under Get Started with Inningly.
- Select Get started →.
- On My Teams, select Create Team.
If you already have a team, select Teams from the Inningly header and then select Create Team.
You do not need to prepare a roster, schedule, or lineup settings before creating the team.
Start with Free or choose Inningly Plus#
The Choose your Team plan window opens when you reach the Create a Team page.
Free is a fully functional team plan—not a trial. You can build a roster, manage the team schedule, generate and save lineups, and record pitcher workloads without upgrading.
Select:
- Continue with Free to begin with a Free team. You can upgrade later from Team Settings.
- Choose Inningly Plus if you want additional lineup-generation options, expanded team limits, and more customization for exported dugout materials and other features.
Inningly Plus is purchased for an individual team and season. See Understand Free and Plus for the complete comparison.
Choosing either option closes the window and selects the corresponding plan on the form. You can select Compare plans to reopen the comparison.
Enter your team information#
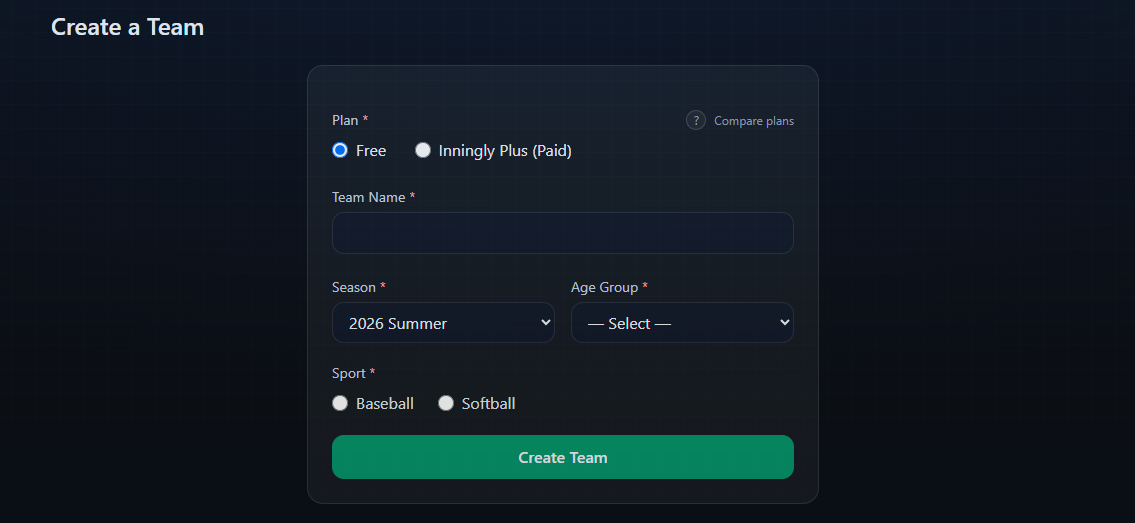
Complete the required fields:
- Team Name: The name displayed throughout Inningly.
- Season: The season this team represents.
- Age Group: The team’s current age level.
- Sport: Baseball or Softball.
Your selected plan also appears on the form. Review the information before creating the team.
Choose the season carefully#
An Inningly team represents one season. The season controls how the team is organized on My Teams and when that team’s season ends.
Caution
Season Selection
The season cannot be changed after the team is created. Confirm that you selected the correct season before continuing.
When the next season begins, create a new team rather than changing the existing one. You can then reuse returning player information by following Set up your team for a new season.
The team name, age group, and sport can be changed later from Team Settings.
Create the team#
Select Create Team after reviewing the form.
If you selected Free, Inningly returns you to My Teams. The new team appears under its season and is marked Active, making it the team you are currently working on.
If you selected Inningly Plus, Inningly creates the team and sends you to checkout. If you leave checkout without completing payment, the team still exists as a fully functional Free team and can be upgraded later.
Inningly also prepares the team’s calendar and applies starting settings for games, lineups, and pitching. You can review and change those settings later.
Your team workspace is now ready. Next, add players individually, copy players from GameChanger, or copy players from another Inningly team. You can then add games as the schedule becomes available.
Related articles
- Add Games and Practices Add team events to your team calendar so you can prepare its lineup, batting order, and pitching plan.
- Create a Defensive Lineup Generate a defensive lineup using your available players, team settings, and lineup rules.
- Sync your Inningly Calendar Bring an external schedule into Inningly so games and practices stay available for team planning.
- Understand Free and Plus Compare Free and Plus team capabilities to choose the level that fits how you use Inningly.
- Set Up Your Team for a New Season Create a team for the new season and bring returning players forward without rebuilding your roster from scratch.